Introduction
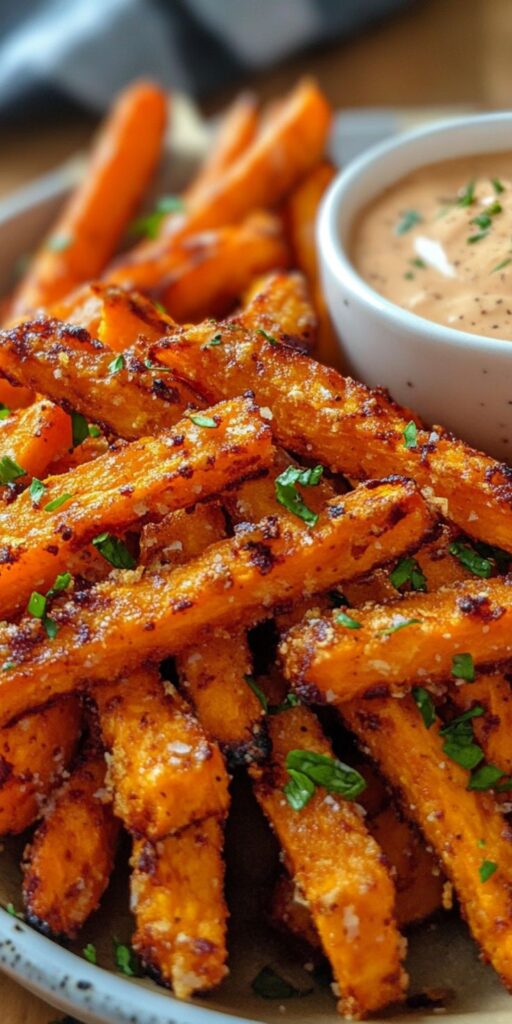
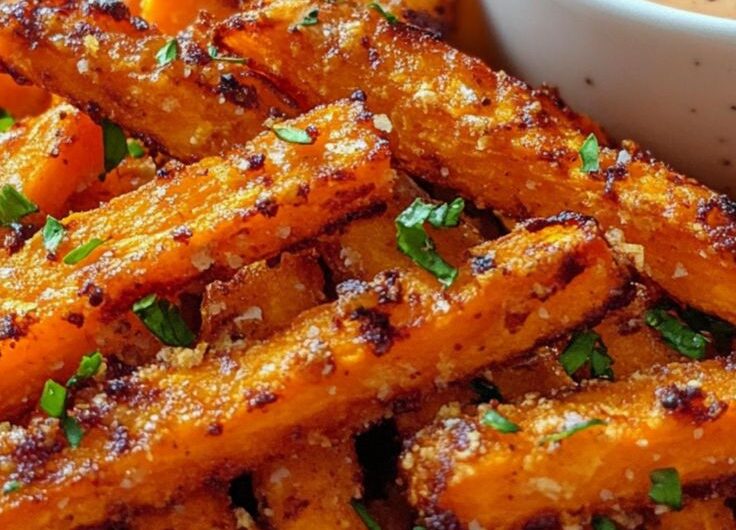
Ever wish for a cozy side dish that feels both comforting and easy to pull together? Crispy Oven Baked Sweet Potato Fries are exactly that kind of kitchen win. They come out golden on the edges, soft inside, and lightly caramelized in the best way. I often slide them into the oven while prepping the rest of dinner, and they never disappoint. Perfect for busy evenings, relaxed family meals, or even a quiet night in, this recipe brings warmth without extra effort. You don’t need fancy tools or deep frying—just simple ingredients and a hot oven.
Why You Will Love This Recipe
Looking for something that feels homemade but doesn’t take all evening? These fries check every box. They’re naturally sweet, slightly crispy, and super satisfying without feeling heavy. Crispy Oven Baked Sweet Potato Fries are also flexible—you can season them however you like or keep them simple with salt and pepper.
Need something weeknight-friendly? These cook in one tray and don’t need much attention, which makes them easy to fit into your routine. They’re also budget-friendly since sweet potatoes are affordable and filling. If you have leftovers, they reheat nicely for lunch the next day.
Want a recipe worth saving? This one feels cozy, dependable, and perfect for sharing, whether it’s just for four people or a bigger gathering.
Ingredients
Choose firm, evenly shaped sweet potatoes for the best texture and even baking.
- 4 medium sweet potatoes (for 4 people)
- 2 tablespoons olive oil
- 1 teaspoon salt
- ½ teaspoon black pepper
- 1 teaspoon paprika
- ½ teaspoon garlic powder
For 2 people: simply use half of each ingredient. For more than 4: double or triple everything, but bake in batches so fries don’t overlap.
Instructions
Step 1: Preparation – 40 words
Wondering how to get evenly cooked fries without fuss? Preheat your oven to 220°C (425°F). Peel if you prefer, then cut sweet potatoes into thin, even sticks. Try to keep them similar in size so they bake at the same speed.
Step 2: Main Cooking Process – 40 words
Not sure how to keep them from turning soggy? Toss the cut fries in olive oil, salt, pepper, paprika, and garlic powder. Spread them out on a baking tray in a single layer with space between each piece.
Step 3: Combining Ingredients – 40 words
Worried about uneven browning? Bake for about 20 minutes, then flip the fries gently so both sides cook evenly. If making a smaller batch for 2, check a few minutes earlier; larger batches may need slightly more time.
Step 4: Finishing & Final Simmer – 40 words
Want that perfect crispy edge? Bake another 10–15 minutes until the edges look golden and slightly crisp. Let them rest for a few minutes before serving so they firm up. For bigger servings, rotate trays halfway through baking.
Why This Recipe Works for Busy Days
Short on time but still want something homemade? These fries are mostly hands-off once they’re in the oven. You can prep them ahead and bake when needed. They also pair with many meals, so you don’t have to plan too much around them. Even leftovers can be quickly reheated, making them perfect for next-day meals.
Tips & Tricks
- Struggling with soggy fries? Make sure the tray isn’t crowded. When fries overlap, they steam instead of crisp. If cooking for more than 4 people, use two trays or bake in batches so each piece has space to roast properly.
- Not getting that golden color? A slightly higher oven temperature helps caramelize the edges. Also, don’t skip flipping halfway through. For smaller portions, keep an eye earlier since less volume cooks faster and can brown quickly.
- Finding uneven textures? Try cutting fries to a similar thickness. Thicker ones stay soft while thinner ones crisp up. When scaling up, take extra care during cutting so everything cooks evenly across larger batches.
- Want better flavor balance? Taste and adjust seasoning right after baking. A pinch of extra salt or paprika can make a difference. If making just for 2, go lighter on seasoning at first—you can always add more later.
Variations
Meaty Version
Thinking about turning this into a fuller meal? Serve these fries alongside grilled chicken or shredded beef. The natural sweetness pairs well with savory meats. For larger groups, simply increase both fries and protein portions together so everything feels balanced on the plate.
Vegetarian Option
Want to keep things plant-based but hearty? Pair the fries with a simple yogurt dip or a bean-based side. You can also sprinkle a little feta or a dairy-free alternative on top. Adjust portions easily by scaling both fries and sides together.
Ingredient Swap
Don’t have sweet potatoes on hand? Try regular potatoes or even carrots cut into sticks. Cooking times may vary slightly, so keep an eye on texture. For smaller servings, test a piece early to avoid overcooking.
Flavor or Herb Boost
Looking to change the flavor profile? Add dried herbs like rosemary or thyme before baking, or sprinkle fresh herbs after cooking. You can also try a pinch of chili flakes for heat. When making larger batches, mix seasoning in a big bowl for even coating.
Serving Suggestions
- With Dips
Craving something fun and snackable? Serve these fries with ketchup, garlic mayo, or a simple yogurt dip. For a small serving, offer one dip; for larger groups, set out a few options so everyone can choose their favorite. - As a Side Dish
Need an easy side for dinner? These fries go well with grilled chicken, burgers, or simple salads. For a family of four, this portion works perfectly, but you can easily double it for gatherings without changing the cooking method. - Loaded Fries Style
Want something a bit more filling? Top the fries with cheese, herbs, or even sautéed vegetables. It turns them into a cozy meal. If making for two, keep toppings light so fries stay crisp. - Casual Sharing Platter
Planning a relaxed get-together? Serve these on a large tray with napkins and dips in the center. For bigger groups, bake multiple batches and keep them warm in the oven until ready to serve.
Storage Instructions
- Fridge Storage
Got leftovers and don’t want them to go to waste? Store cooled fries in an airtight container in the fridge for up to 3 days. For smaller portions, use a compact container to keep them fresh and prevent drying out. - Reheating
Wondering how to bring back the crisp? Reheat in the oven at a high temperature for a few minutes instead of using a microwave. Spread them out again so they crisp up evenly, whether you’re reheating a small or large batch. - Freezing
Thinking about freezing extras? While possible, the texture may soften after thawing. If freezing, place fries in a single layer first, then store in a bag. Smaller portions thaw faster and reheat more evenly. - Make-Ahead Tips
Want to prep in advance? Cut the sweet potatoes and store them in water in the fridge for a few hours before baking. Just dry them well before cooking. This works for both small and large batches without changing the flavor.
Recipe Timing
Prep Time: 15 minutes
Cook Time: 30–35 minutes
Rest Time: 5 minutes
Total Time: 50–55 minutes
Nutrition Information (Approximate)
Concerned about what’s in your serving? Each portion has around 180–220 calories, with about 2–3g of protein. Sweet potatoes are also a good source of fiber and vitamin A. Values are estimates and may vary depending on ingredients and portion sizes.
FAQs
Can I make these ahead of time?
Yes, you can cut and store the potatoes earlier, then bake when ready.
Why are my fries not crispy?
They may be overcrowded or not baked at a high enough temperature.
Can I use a different oil?
Yes, any neutral oil works well in the same amount.
Why are my fries too soft?
They may be cut too thick or not baked long enough.
How do I store leftovers?
Keep them in the fridge in an airtight container for up to 3 days.
Can I adjust the flavor?
Absolutely, add spices or herbs to match your taste, especially when scaling portions.
Conclusion
Looking for a simple way to make a cozy, satisfying side at home? Crispy Oven Baked Sweet Potato Fries bring together ease, flavor, and comfort in one tray. They’re easy to adjust for different serving sizes and flexible enough to fit any meal. Whether you keep them classic or try new flavors, this recipe is one you’ll come back to often. There’s something special about pulling a tray of golden fries from the oven and sharing them while they’re still warm.
Recipe Card
Recipe Title: Crispy Oven Baked Sweet Potato Fries
Description:
Simple, crispy, and full of flavor, these oven baked sweet potato fries are perfect for everyday meals. Easy to make and great for sharing with family or friends.
Recipe Details:
Servings: 4 people
Prep Time: 15 minutes
Cook Time: 30–35 minutes
Total Time: 50–55 minutes
Calories: ~180–220 per serving
Ingredients:
- 4 medium sweet potatoes
- 2 tablespoons olive oil
- 1 teaspoon salt
- ½ teaspoon black pepper
- 1 teaspoon paprika
- ½ teaspoon garlic powder
For 2 people: use half of each ingredient. For more than 4: double or triple and bake in batches.
Instructions:
- Preheat oven to 220°C (425°F). Cut sweet potatoes into thin, even sticks.
- Toss fries with olive oil, salt, pepper, paprika, and garlic powder.
- Spread on a baking tray in a single layer.
- Bake for 20 minutes, then flip.
- Bake another 10–15 minutes until golden and slightly crisp.
- Let rest for a few minutes before serving.
Crispy Oven Baked Sweet Potato Fries
4
servings15
minutes30
minutes180
kcalIngredients
4 medium sweet potatoes
2 tablespoons olive oil
1 teaspoon salt
½ teaspoon black pepper
½ teaspoon garlic powder
Directions
- Preheat oven to 220°C (425°F). Cut sweet potatoes into thin, even sticks.
- Preheat oven to 220°C (425°F). Cut sweet potatoes into thin, even sticks.
- Spread on a baking tray in a single layer.
- Bake for 20 minutes, then flip.
- Bake another 10–15 minutes until golden and slightly crisp.
- Let rest for a few minutes before serving.